Hey Beauty Fam!
I finally got around to testing out every product that I got in the Sephora VIB Sale! I thought I would share my thoughts and show you the look that I created and how I did it. I posted this look to Instagram right after creating it, and I got a bunch of DM requests to do a tutorial. It also just so happens that I tested all of the new products for the first time in this look. So here it is, a tutorial on this highly requested look ❤
The following products were put to the test:
- Anastasia Beverly Hills Modern Renaissance Palette
- Marc Jacobs O!Mega Bronze Perfect Tan Bronzer: Tantric
- Kat Von D Tattoo Eye Liner In Trooper
- Sephora Cream Lip Stain In Marvelous Mauve
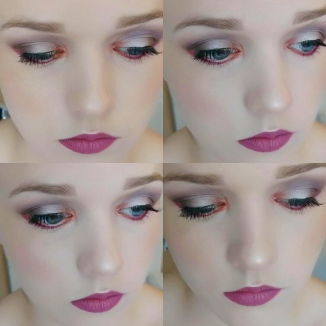
This is the look that I created with all of these products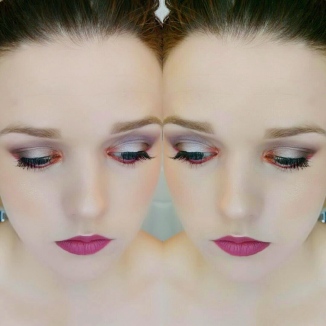
1. Modern Renaissance Palette
This was my first time using the palette after swatching it. The swatches are available in my Sephora VIB Sale Haul post. Click Here! After how impressed I was with the swatches I couldn’t wait to dive right in! I started this look off with the eyes. I first primed my lids using the Tarte Shape Tape concealer. I then did the following (The numbers shown on the palette correspond to the list):
- Tempera: Set my concealer all over the lid up to my brow bone. At the end of the look I used this as a brow bone highlight.
- Raw Sienna: Buffed this into the crease as a transition shade. I took this shade quite high, almost to the brow bone.
- Buon Fresco: Using a more defined crease brush I built this up in the crease, blending it upward into Raw Sienna. I kept building it up until I got a beautiful mauve-purple that stood out; making sure I blended, blended, and blended!
- Vermeer: I packed this on the entire lid making sure I didn’t go up into the crease. It was so pigmented that I did not need to wet my brush to make it pop. I also packed this on heavily in the inner corner. I wanted a light base for what I actually used as an inner corner colour to make it bright and pop.
- Cyprus Umber: I packed this on the outer V of the eye making sure I blended it into the lid shade and the crease shade.
- Love Letter: I blew this out using a pencil brush on the lower lash line. I brought this down quite low as I wanted it to look really pink and give the look a pop of colour.
- Realgar: I placed a small amount of this on the inner corner of the eye on top of the Vermeer shade that I previously placed down. This make the orange brighter and stand out beautifully.
On first impressions, these eyeshadows are amazing!! The only downfall is that there is a TON of fallout on the face and kickback in the pan. I highly suggest using a light hand when dipping the brush into the eyeshadow and tapping the excess off. After doing that, I didn’t have as much fallout or kickback. With that being said, the pigmentation and buttery feeling of these shadows are 100% worth it. I didn’t even need to wet my brush to make them stand out! They are so easy to blend on the eye. I have never been able to create a detailed look so quickly! The shade range in this palette is amazing. There is a shadow for everyone! You have a great mixture of mattes and shimmers and also warm and cool tones. Right now, I am loving the mauve purple. it is by far my favourite shade! What is your favourite shade in the palette? Let me know in the comments below!
2. Marc Jacobs O!Mega Bronze Perfect Tan Bronzer: Tantric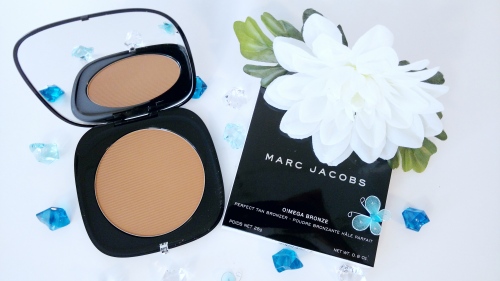 After doing my eyes, I took a makeup remover wipe and carved out a straight edge to make a wing-like effect. I then went ahead and did my face makeup up until the point of bronzer. On first impressions this bronzer is amazing!! It warmed up my skin in this look beautifully without making me look orange or muddy. The pan is huge so it was super easy to get a big bronzer brush in it. There was very little kickback, and it glided on my skin seamlessly. The powder is very finely milled so it doesn’t look cakey or emphasize texture. It blended out so easily. I am lucky enough that my skin doesn’t pull out orange tones very easily, so it didn’t look orange on me at all. However, I can see how this may pull quite orange on skin tones that are more fair than I am. So even though this works amazing for me, keep in mind that it does have an orange undertone and won’t work for every skin tone. If you want to see this bronzer swatched check out my Sephora VIB Sale Haul Post. Click Here!
3. Kat Von D Tattoo Liner In Trooper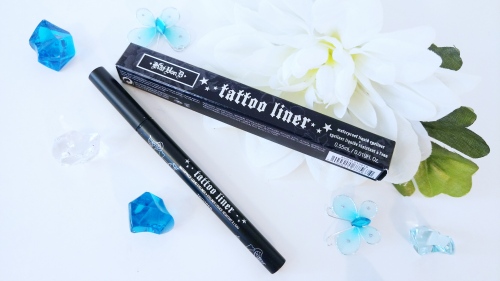 After finishing off my bronzer, blush and highlight I went back to the eyes and applied some eyeliner. On first impressions, this felt tip eyeliner has become my new favourite. The tip is dense enough where you have amazing control over it but thin enough that you can get a super precise application. For this look, I didn’t want a winged eyeliner because I loved how the eyeshadow turned out. Therefore, I wanted it to be the centre focus of this look. I absolutely loved how easy it was to get super close to my lash line! I felt like I had amazing control over it and wow, talk about it drying down super matte black! This created an amazing base for my Kiss 11 lashes that I applied after. A few days later I created a wing with this eyeliner. Creating my wing has never been so easy! You will see in future looks how it turned out!
4. Sephora Cream Lip Stain In Marvelous Mauve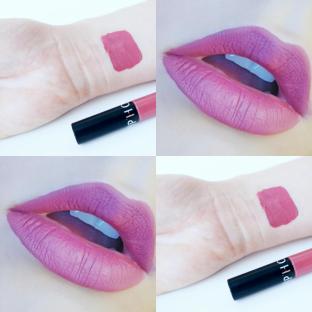 I finished this look off with this lip stain. I would personally say it is more like a long wearing matte liquid lipstick. I honestly thought that liquid lipstick formulas could not get any better than the Jeffree Star Cosmetics ones that I tested out a few blog posts back. Well, I was wrong! This is hands down amazing! It is super light weight and the precise dow foot applicator makes it easy to apply to the lips. It dries down matte, but it feels like a velvet cream. It is so comfortable! I wore this for 8 hours, and it did not feather or break down. It passed both the kiss and eating test! The colour paired so beautifully with this eye look because it has a mauve under tone. Needless to say, I was absolutely digging this whole look!
I hope you all enjoyed this fun, first impressions blog post that included a mini tutorial! When this was requested, I knew that I had to create this post for you all. Leave me a comment down below on requests for future blog posts. I would love your input ❤
Thank you so much for reading, Until Next time,
-xo. Elizabeth

Wonderful look! I love the balance of warm and cool shades between the eyes and lips! Thank you for the follow as well! 🙂
LikeLiked by 1 person
Aw thank you 😊❤ and your very welcome loving your blog 😊
LikeLike
Love! Marvelous Mauve is one of my favorite lipstains 😍
LikeLiked by 1 person
Yay 😍 any other shades or liquid lips you suggest? 💕
LikeLike
Beautiful look! So edgy. The red looks badass! These products seem really nice… xoxo Sarah
LikeLiked by 1 person
aw thank you 🙂 !! yeah these products are definitely some of my favourites now, they all worked so well 🙂 ! xo
LikeLiked by 1 person
I love the eye look, so unique!
LikeLiked by 1 person
Awe thank you 😊❤
LikeLike